Showing posts with label dollmaking. Show all posts

Custom waldorf softie doll


Recently I had a request for a softie doll from a customer who had previously purchased one for her niece. Apparently, the doll was so well loved that another was wanted. We decided to make a "sister" for the first doll and I just happened to have enough of this cute green mushroom fabric left to keep the mushroom theme going.


Here is the original. I think they make great sisters and I hope that the new doll will be as well loved as the old :)

If you like this style of doll I have 2 tutorials on how to make your own. The first tutorial is here and the second is here.

Oh, and a reminder that the 500 likes celebration giveaway is still running - you can win some lovely hand dyed yarn by entering here.

Some wee waldorf dolls


The winner of my Christmas giveaway was Tas and she requested some wee waldorf dolls for her daughter. They are only 6 inches (15cm) tall. I can show them here now because they have been (well) received.


Her daughter loves pink and is warming to red, so the dress colours were chosen accordingly. The blondie has mohair yarn for hair and the brunette has curly dyed mohair (one of my favourite materials ever!)

Plenty on the "to do" list today but unfortunately no crafting on the agenda, too much "important stuff" to be done.
Perhaps I could sneak in a few minutes of hand embroidery tonight?.....

Mohair is just so pretty!

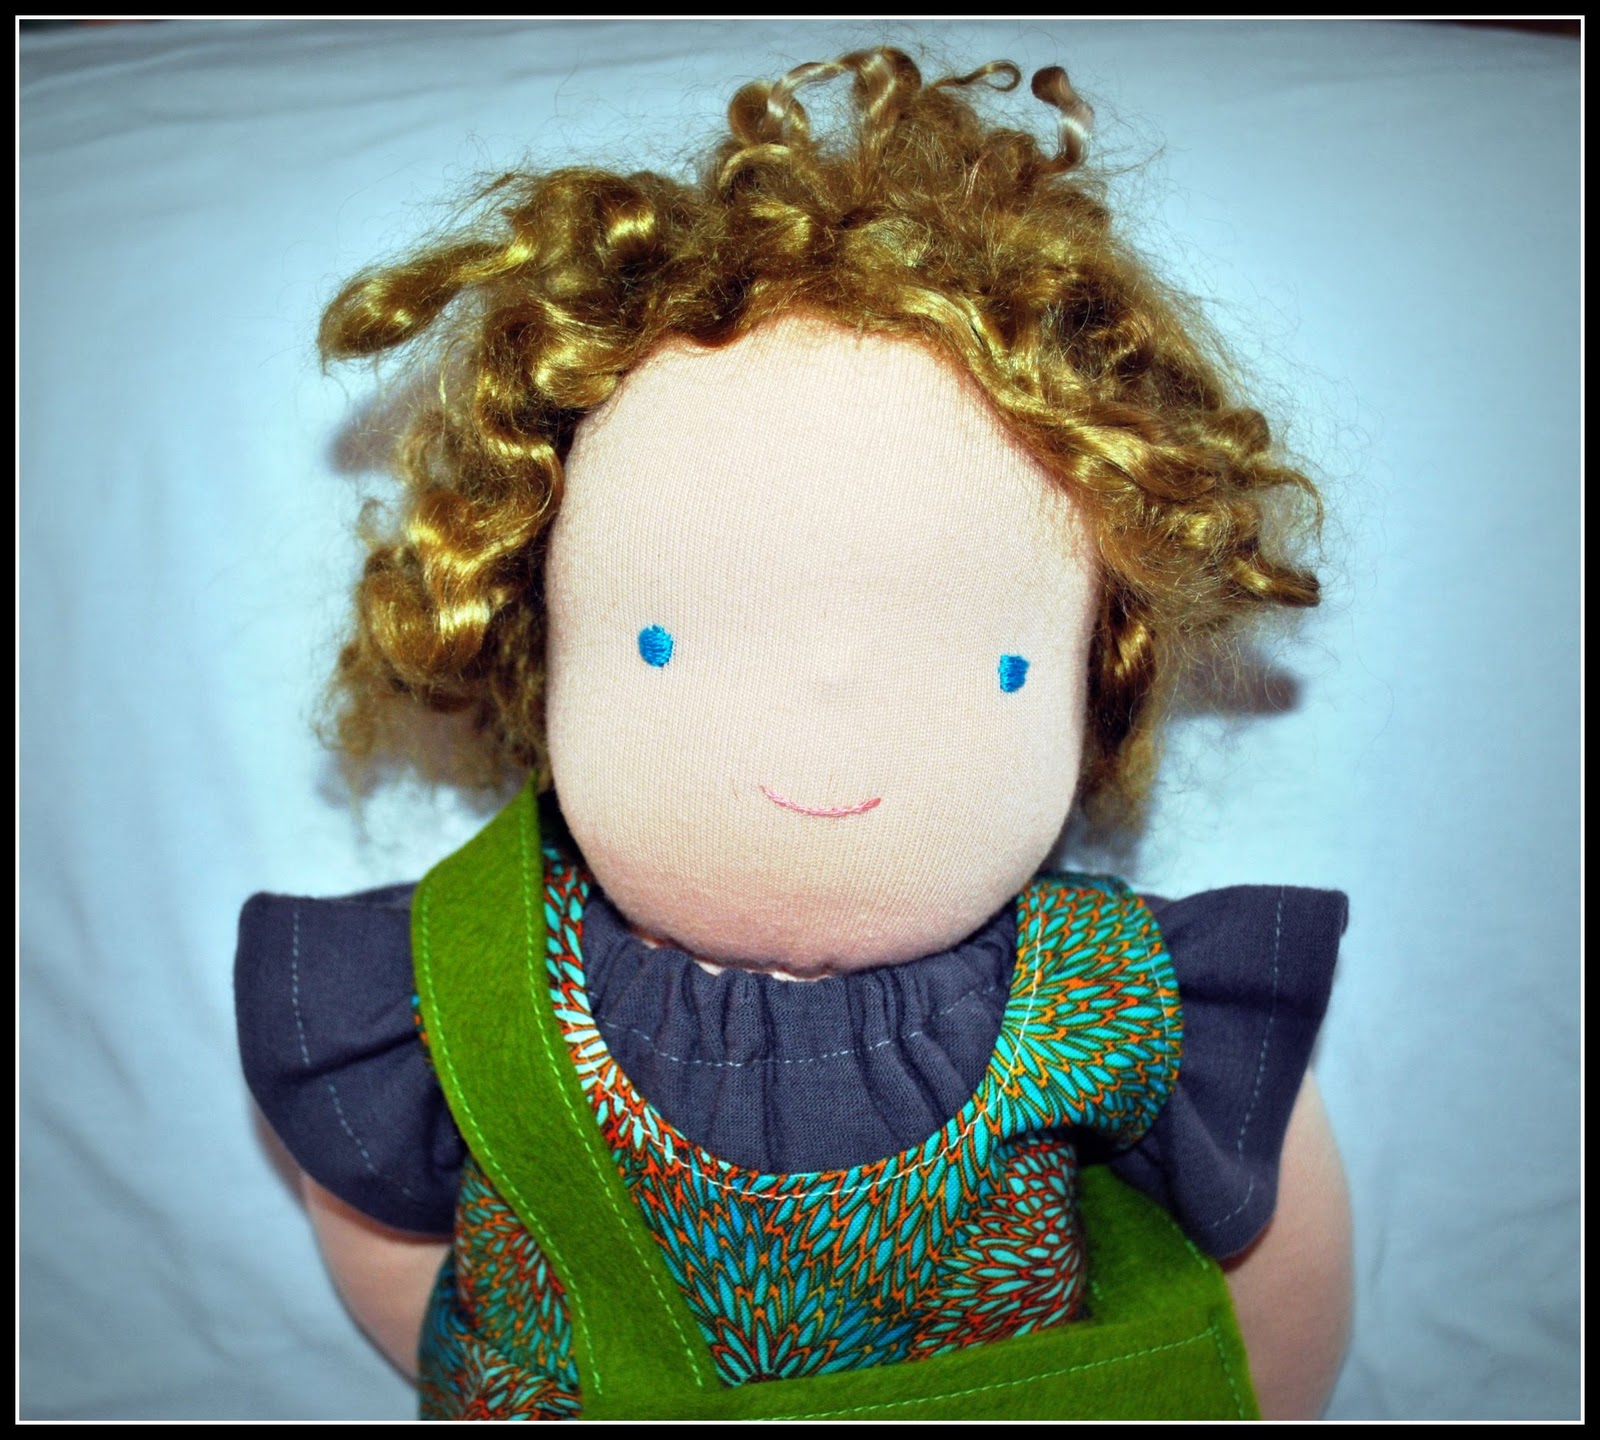
This doll is a custom order for Christmas. The customer sent me some fabrics with specifications for clothing. I'll admit I was a little skeptical about the colourways but I think they've come together beautifully.


The pants are bamboo velour, the top is a knit and the pinafore a cotton print. She also included the green wool felt so I made a bag with that. She has other outfits too but in my haste to send her off before Christmas I haven't take extra photos.


The customer also requested mohair for the hair. This is sewn on piece by little piece until the whole head is covered. It takes a long time!


This dyed mohair is from Stokesay Mohair farm in Victoria, it is really beautiful stuff and gives such a realistic look to a doll.

My Melbourne Show entry


Hooray, finished in the nick of time!

A doll and her doll!


I used 3 different yarns for the big doll's hair - sheep's wool, mohair and alpaca in three colours.

If you're braving the show this year please do pop in to the art and craft pavillion to see one of my dolls "in the cloth". She (they!) will be in the Novelty Toy section.


                         Little embroidered wool felt shoes (recognise the bird print Nic?)

This will be my first entry into any art and craft competition so it's quite exciting. Thanks to Nic from Yardage Design for the heads up and encouragement. Wish me luck!

Lil' Mim sisters


I finished the other doll I was working on, her new owner loves the colour blue and has hazel eyes with brown hair. I decided to give her super long hair, I just love a doll with long hair.


This is the first time I've made a pair of dolls for sisters, I think it's really beautiful that they'll both have              their own special doll for Christmas. These 2 are about 13 inches tall and made with the my usual favourites - cotton tricot, carded wool, mohair yarn and lovely prints for their dresses.

Last night I started work on my doll for the Melbourne Show, I've left it a little late, but it's cool, she'll get there!

Strawberries and cream


That's what she makes me think of. She is a custom order I've just finished for a little girl. I'm working on a doll for her sister now. I knitted her a little bolero shrug out of cashmere that turned out very nicely even though I don't really know what I'm doing when I pick up the knitting needles.


A back view of the bolero shrug.
I like to always put a little surprise like this into my customer's parcels. I want them to be really delighted when they open it up and get something extra that they don't expect.


                                                        I hope her new owner likes her!

In my studio today...

Doesn't that sound posh - "In my studio?" Maybe one day I'll be lucky enough to really have a studio but for now lets just pretend!


Some cheery little doll's faces for a custom order. Don't they look comical without hair?


Some more colour experimentation with fabric painting. I went for soft hues with these. The blue one is on homespun.


I painted cotton lawn with soft pinks, yellows and reds for this soft and muted one.

I'm contemplating introducing hand dyed and painted fabrics, ribbons and threads to my Etsy shop.
Any thoughts?

Busy, busy, busy!!


I've managed to fit in a lot of sewing and crafting time this week. I'm showing glimpses of something I've been working on to try and impress someone. More about that later I hope.


I love the colour combinations.


I'm so pleased with the finished product. 

This being my 399th post can only mean one thing. 
So.. to celebrate my 400th post (and today - my 34th birthday!) I'm running a giveaway.
Stay tuned, it's a good one!

Baby's first waldorf softie


Well, she isn't such a baby anymore, her first birthday is next month! Although she won't be playing with dolls for a little while yet I think it  is a beautiful first birthday gift.


I made this 12 inch doll's body from soft flannel. I tried out a new hair technique and am very satisfied with the results, it's very secure and lifelike with no long strands for busy little fingers to pull out. I can also add a pony tail later if it's wanted.


Bub's initial is embroidered so there can be no question of ownership (she does have two sisters after all!)

UFO or PFP?

The former being Unfinished Object and the latter being Partly Finished Project. I think I like PFP - it's a little more positive, more like a WIP (Work in Progress) and less like a FTF (Failure to Finish).

Whatever you choose to label it, I have 13 of them! Now, I know I'm not alone on this, and probably like me you avoid the fact that you have so many projects on the go at one time. It's your little secret, am I right?

As finances are a bit tight at the moment and I can't indulge in new materials I'm finding it a perfect time to finish off a few of those projects that had just been "put aside later" AKA "I've lost motivation and can't be bothered".

Here are a few things I'm working on:


Baby gowns and blankets for the Bonnie Babes Foundation. Some finished, many unfinished!


A cute waldorf softie doll (needs hair)


Embroidering vintage pieces (pure joy!)


Baby Mary Janes (need snaps).

So, how about you share your little secret? How many PFP's do you currently have?

The Craft Circle


I heard about The Craft Circle from another doll maker recently and was naturally very keen to check it out. The shop is run by Juliette and is situated in Kingsville. She has all sorts of natural materials (the fleece selection is to die for!) for doll making, felting and knitting as well as hand made items.  She is a really lovely person to talk to and I was very impressed when she pulled out a mat and basket full of hand made toys for my daughter to play with while I browsed all the lovelies. If you're in the western suburbs of Melbourne it's well worth a visit, Juliette is happy to order in anything she doesn't have in stock.

Lil' Max!


Girls can't have all the fun all the time! A little companion for Mim or a play doll for a boy.
I got some lovely red chenille and made overalls for him, then handstitched the wool felt detail.


He has a pair of flannelette play pants too.


And a good mop of hair. He'll be in my Etsy shop tomorrow, today I feel too lazy!

It's great to see Lil' Mims gaining popularity with custom orders coming in. I'm keeping quite busy with little faces and outfits these days!


Crafty Mamas get together


There were only a few of us but we had a great day. We met at Nat's quaint and lovely home where she has an upstairs room devoted to sewing (yes, we were jealous!)
Above you can see Nat and Claire hard at work on their dolls.


Zofia and I marvelled at Nat's beautiful sewing machine- computerized and so quiet and smooth.


Nat took to doll making like a duck to water.


Claire made a doll for her eagerly awaiting daughter.

We all determined it was a lot of fun and something to definitely do again.
Many thanks to Paul for his enthusiastic help with the children, he did a brilliant job.

Funny things happen while you're away...


The garden was fairly dry when we left but apparently Melbourne had a lot of rain and we've come back to a jungle - like backyard complete with giant zucchinis. The one at the front weighed in at 2.9 kilograms!!  Unfortunately they're not really edible at this size (I've tried!)

I'm working on a few things at the moment. Actually, I just want to plonk myself in front of the sewing machine after my week away, but there is so much else that needs my attention! I'm hoping to finish off a new doll this week, start on a custom order and organise myself for the Crafty Mamas get together on Friday where I'll be teaching doll making for the first time (gulp).

Better get back to it.....

Doll making tips

I certainly don't consider myself an authority on making dolls, but here are a few tips that experience (and repetition) have taught me:

* Wash your hands thoroughly before starting. This may seem obvious but even the natural oil from your skin can affect your skin fabric, remember - your doll will have been held a lot before she is completed!

* Use quality materials. Costly, yes. Worth it? Yes! This includes your threads.

* Use small stitches. Whether you hand or machine stitch your dolls you don't want them coming apart at the seams.

* I like to keep all my work tidy, even the parts that won't be seen. It helps to develop quality workmanship and good habits.

* When embroidering facial features don't pull the thread tight, just let it sit comfortably on the surface - no puckers.

* I use doubled quilting thread for sewing on limbs It's particularly important when making dolls for children that the doll is strong.

* Sink stitches back into the body when finishing for tidiness.

* If your dolls legs and body are one piece, double or triple stitch the groin area, as it's vulnerable to coming apart or ripping.

* For corners (around hands, feet, etc) use the stitch, stitch, turn method.

* Don't rush! Enjoy the process and take time to be careful. As you become more practiced you will also get faster.

Hope you find something helpful there!

The fairy queen?


She looks rather queen like don't you think? I was asked to custom make a fairy outfit and this is what I came up with. A beaded wool felt crown and velvety cape.


A sparkly rainbow fairy dress.


And of course, a fairy is not complete without her wings!
I really enjoyed making this outfit.


This little one has a new dress with a wool felt cape and boots and is heading far away to her new home in the U.S.A tomorrow.

A life filled with dolls


I don't know how it all began, this love affair of mine with dolls.
I would be quite content to sit all day and make them, one after the other. If I had that sort of time I would make them all manner of accessories, quilts, clothes and toys.


It's an absolute wonder to me how you can take beautiful pieces of fabric and form and stitch them into something that almost seems to have a personality. I just love them!


My latest Lil' Mim is slightly larger than the last at 12 inches (still petite). She will be in my Etsy shop shortly. I hope she captures someone's heart as quickly as her sister did!


SOLD - THANK YOU AMY!!!!!


Today is....


Enjoying the cooler weather and baking homegrown zucchini loaves. I must give you the recipe, it's fantastic!


Feeling thankful for the overnight and much needed rain and bountiful harvest from the vegetable garden.


Watching new personalities emerge from lovely dolls.


Roasting and grinding coffee, filling the house with a beautiful caramel scent.


Making another batch of homegrown tomato relish.

I love a cool day after a hot spell.

New hopes and a sneak preview...

I'm hoping to accomplish my first (ever!) pattern release this year. I've been wanting to do this for a long time. If it goes well it will be the first of many. So, some clues...


                             Little bestockinged feet...


Pretty little dresses....


And chubby little arms....

Have you guessed yet? I know, it's not hard to figure out!

I'm really excited about this project, the prototype has come up better than expected so I couldn't be happier with it.

For me this is also a challenge for this year to stop being so afraid of failure, which often stifles me and prevents me from doing what I really want to do.

Now to get down to some serious pattern writing.........


This blog is closing!

All posts will now be found at my new site.  Click here to go the the new site.