Basic Lemon & Poppy Seed Cake


For the cake

125grams butter
1/2 teaspoon vanilla extract (or essence)
3/4 cup sugar
2 eggs
2 cups self raising flour
1 cup milk
rind of 1 lemon
2 teaspoons lemon juice
1 tablespoon poppy seeds

 For the glaze

3 tablespoons sugar
rest of juice from lemon

Preheat your oven to 180 d (c). Grease and line a standard round cake tin.
Cream butter, add sugar, vanilla and grated lemon rind. Beat until nice and creamy. Add eggs one at a time and beat well. 
Add the 2 tspns of lemon juice to the milk and mix lightly. Add the sifted flour and milk to the butter mixture in turns while beating slowly. Add in poppy seeds. Beat until creamy.

Bake for 30 - 40 minutes, cake is cooked when a skewer stuck into the middle comes out clean.
When ready, turn out onto a wire rack to cool.

While the cake is warm, brush on the glaze which you've prepared while the cake is cooking.
In a small saucepan, heat the sugar and lemon juice for about 5 minutes until beginning to thicken. You can let the glaze trickle down the sides of the cake if you have it on a plate!

This cake is gorgeous warm with double cream or icecream. Very popular with the children too!

Turn a top into an apron...


I bought this top at an op shop for a few dollars. When I put it on at home it didn't suit me and looked very apron - like. Well, a girl can never have too many aprons! A pair of scissors and a sewing machine later..... Here's an overview of what I did:


I started by cutting straight up the middle of the back so that when laid out it looked like this.


Then I cut out the sleeves, just following the seam lines (cut out the seams too.) Because of the style of the yoke and neckline, mine now looked like this.


Next I folded it exactly in half and cut an "apron shape" - that is that sort of curved look where the sleeve was. You can either "wing it" or use an existing apron as a guide for the shape. I also cut a few inches of excess from the back edges for a good fit when wrapped around.


The next step is to overlock (serge) all raw edges, which in this case was right around the sides and the top ties of the apron. Using the tie that came with the top, I cut it in half before attaching it by the raw edges to the sides where I wanted the apron to wrap around and tie at the back. Once all the edges were tidy and finished I sewed the ties at the top together to form a loop to go over my head.


Don't you think it looks much better as an apron?!

The finished bear


Well, almost finished anyway, I'm thinking about making a dress as well (which some members of my family find very strange - "why would you put a dress on a bear?!")
If you missed my last beary post, this is a design by Joan Blyton and is 12 inches tall. 


This was a steep learning curve for me - the jointing and positioning of limbs as well as the facial features was really challenging, and I found the instructions sadly lacking in detail. I ended up needle sculpting the face quite a bit as I didn't like the way it looked.

I'm not really happy with this bear, I think it's a "cute" bear but lacks character. I'm sufficiently pleased though to have another go in the near future, I've already started drawing up some designs to hopefully achieve the look that I like.

I must also say a big thank you to Sandi for her help and encouragement!

Cornflake slice


My mother-in-law gave me this recipe, the children love it. Very easy.

1/4 pound butter
1 tablespoon honey
1 cup oatmeal
1/2 cup sugar
1 cup cornflakes
1 cup coconut

Mely the butter and honey and add to mixed dry ingredients. Press into a shallow tin and bake at about 160 degrees (celsius). Allow to cool in tin, cut into squares. Simple!

Egg throwtogether slice


It's a strange name for a dish but I'm at a loss to know what else to call it. It's one of those dishes you make over the years and alter to suit what you have available. I have made this a lot since we have been keeping chooks and have plenty of eggs. So here's a basic recipe to get you started:

10 large or 12 smaller eggs
1 onion
3 - 4 rashers of bacon
1 cup milk
1/2 to 1 cup of milk
1/2 cup self raising flour
1 cup cheddar cheese (use some parmesan too if you have it, it's delicious!)
1 tablespoon olive oil
1 tomato
salt & pepper
garlic salt, herbs, other seasoning (optional)

Cut up your bacon into small pieces and fry in olive oil until browning and smelling amazing. Add in chopped onion and continue to fry until browning. Lay into a large greased dish. (I use a large rectangular dish or roasting tray, as long as it has deep sides).
Whisk eggs in a bowl, add olive oil, salt, pepper and other seasoning if using. In a cup mix the flour with enough milk to make a paste, continue to mix in milk until runny in consistency.
Whisk the milk and flour as well as remaining milk into the eggs. Pour the mixture into your dish, over the bacon and onion.
Sprinkle grated cheese all over, then place thin slices of tomato on top.
Bake in a hot oven (200 degrees celscius) until golden brown on top.
Beautiful served with fresh, crisp salad.

There are plenty of other ingredients you can add to this, lastnight I dumped in a cup of leftover cooked rice. You can add grated zucchini, leftover roast vegetables, capsicum, tuna etc.

A very quick and easy dinner that all the family loves! If you try it let me know what you think.

Homeschooling makes Mum smarter too!

I'm very often asked whether, as a homeschooling Mum, I am a qualified teacher. My reply is usually along the unpopular lines of "I believe every parent is qualified to teach his/her child". Which is usually met with a blank stare, followed by a polite if not bewildered "oh".

The truth of the matter is that I am a university dropout who wasn't particularly academic at school. I put in the effort, but didn't get the grades.

Since I started homeschooling I've realised how much I don't know and how much of the drivel I was taught at school was incorrect, hypothetical and (in my opinion) stupid! Homeschooling is like being given a second chance at learning. Even though you are the teacher you are learning and revising at the same time and it's a wonderful thing. It makes me a more effective teacher because I am a genuinely interested student.

If you have considered homeschooling but don't think you have the smarts I recommend to give yourself a chance, and with the right resources and attitude, you can do it!

I was lucky enough to win


This beautiful little skirt in a giveaway by Missy Melly. Skillfully made from gorgeous prints and my little one loves it. I'm really impressed by the professional presentation of the Missy Melly swing tag and business cards that were included - this lady knows what she's doing!!


I also snapped up some monkey hair clips - who could resist?

Thank you for making this a happy day for us Shan!

Kitchen appliances I love


My grandparents gave us this slow cooker which is large enough to feed an army. What a great invention this one is! Cheap cuts of meat are transformed into tender morsels, and it's totally set and forget - a busy Mum's dream come true. I'll be using this constantly over winter.


It took us a while to figure out how most Asians in this part of the world cook their rice so perfectly - rice cookers!  So easy to use, it cooks your rice quickly and perfectly, no more soggy mush!

Gulp.... I'm scared!


OK, I've come this far, and I'll readily admit it's been a challenge. "But you're a doll maker!" I hear you say. "Making bears should be easy for you - right?!"

WRONG!

You may notice that my otherwise assembled bear remains earless and faceless. There is a reason for that. Today I started to tentatively snip some hairy bits from around the muzzle, as you do, but was suddenly paralyzed (scissors in mid air) with fear that I was going to stuff it up. Badly. I don't like to stuff up badly, especially when I've invested considerable time and money in the first place.

So maybe I need to get over myself a little, but in the meantime the bear will sit and look (well not actually look - she doesn't have eyes) but just sit there until I get some courage to finish her off.

P.S. Any tips or recommendations will be heartily welcomed!


Heart swaps and op shops


I sent off my offering to my swap partner in the US for the Share the love heart swap over at Natural Suburbia. I can't show the whole thing until it reaches the intended destination - lets just say it's something that every creative soul needs!

I finally got to the op shop today to look for some drawers for the girl's room. Although sadly lacking in the furniture department I found a lot of clothes for me so all was not lost. One thing I love about being able to sew is knowing you can alter clothes that are too big, that's a huge bonus if you're an opshopper!

Husband has taken 3 of the children out mountain climbing (it's a small mountain!!) and baby is in bed, so it is wonderfully quiet and full of possibilities here.

Hope you're all having a great day, I'm off to explore those possibilities!

Really inspiring

I've been participating in a couple of blog themes each Friday (Saturday here is Oz.)
If you're looking for some beautifully inspiring projects, tutorials or just eye candy check out these links (you'll see me in there somewhere too!).

The Magic Onions - Friday's Nature Table

Natural Suburbia - Friendship Friday

Thanks for your recent kindly comments, I think I'm on the mend now and I'm planning on making my hands busy today (at the sewing table of course!)

Wishing you many blessings this weekend.

Under the weather


I've had a funny virus this week that's left me feeling pretty run down. It has also coincided with the little one teething so I haven't had a decent sleep for a while. I feel like my brain's wound up while the body is the opposite. I'm sick of my house, sick of my daily routine, sick of feeling sick of.......  I feel like I need some serious cheering up.

Maybe a visit to the oppy?........ We'll see what tomorrow brings.

New play clothes


I made some much needed warm play clothes for the girls. This is what I like - simple and quick sewing with a cute result. I actually get a lot of clothes sewn up in my mind, but sadly not many in reality!

I modified the Miss Madeline dress pattern to make long tops with 3/4 sleeves.
The leggings are from a very easy Simplicity pattern.


This little one hasn't quite got her "camera smile" figured out yet!

The fabric was all on special at Spotlight. I find knits really easy to work with these days, providing they don't have too much stretch. I usually look for cotton with about 5% lycra or similar.

I'll be making more of these, the girls find them so comfortable too.

Doll hair tutorial

 After a number of requests for help with stitching on doll hair I've finally made this tutorial.


Start by winding lengths of your yarn around a stiff book. If you want long hair your book will need to be larger than if you want shorter hair. Cut the yarn along one end of the book. This will leave you with long, even lengths. Place a plastic headed pin at the front of the forehead of the doll (see the pink pin above?) and another towards the back of the top of the head (see the purple pin?)
Lay your lengths of yarn across this section of the head (between the pins) so that the length is the same on each side of the head. Tie a piece of string or ribbon around the doll's neck to help hold the hair in place. With a doll needle and doubled thread, stitch down the middle of the head back and forth between the pins. I usually stitch back and forth at least 3 times with a good strong backstitch.


This is how you tie around the neck to hold the hair in place. Take off the tie and spread the hair around the back of the head, if you can get the head evenly covered then you have stitches on enough hair, if not, you may need to stitch on more. The purpose of this first layer is to cover the head, so you don't want any baldy patches showing through!


After stitching down the middle, place marking pins all around the head (as above) - about 2 inches down from middle stitching. Once again, use doll needle and doubled thread to stitch the hair down from one side of the head to the other. Remove pins. 
Do the same again, about another 2 inches down from where you just stitched, very close to the neck.


Using your book and pin trick from step one, place another lot of yarn lengths across the top of the head between the pins. Tie with string or ribbon again. Stitch down once again, between the pins, back and forth. Remove the tie and pins.
Fluff the hair with your fingers so that it falls naturally around the back and sits nicely on top of your initial layer. 


                                                                   A full head of hair!

*If you have a large doll you may want to do 3 layers of hair, depending on the thickness required.

* I mostly use boucle wool for hair as it gives a really full and quite natural look. If you want straight hair and are using straight yarn, you will need to use more to give good coverage.

I hope this is helpful :)

Free range versus cage chickens


We just got our new batch of Isa Browns which is always exciting. We keep them in a large enclosed pen which also has a wooden house and laying boxes (a converted dog kennel), nothing fancy but warm. cosy and comfortable.

We bought these ladies from a local cage egg farm, which is a bit strange because I'm completely against cage egg farms. But my reasoning is quite simple. You buy the young chooks from their elevated cages from which they've just been yanked out of by the legs by the staff member. You get them home and let them out of a cardboard box into the yard you have prepared for them. And this is the good part. You watch.

These feet have never stepped on bare earth. They have never pecked at a worm or insect. They have never walked freely!

So, my husband and I both agree it's worth freeing these chooks from a life of misery in a cage and giving them the opportunity to do what comes naturally. This morning they had their first hot mash and were suitably impressed.

I'll discuss egg farms again in a later post, I think it's time for change.

Interview with Poppy Bean and Bloss!


Now for my second interview with crafty women in business we meet Michelle from Poppy, Bean and Bloss. If you haven't stopped by Michelle's store yet it's about time you did, she has a gorgeous variety of waldorf dolls and toys as well as sock monkeys and covered notebooks. I'm particularly fond of the outfits she makes for her dolls.


* What prompted you to start your business/how long have you been in business?

I launched my online store (http://www.poppybeanandbloss.com.au) in February 2008 but had probably spent 12 months before that working on designs and having toys tested for compliance with Australian Safety Standards.  I started with sock monkeys (having made my first one as a present for my niece) and then I made my first doll, and haven't looked back since.  I really love making the dolls and seeing each one come alive. I still love the monkeys, but waldorf dolls are my passion now.

*What do you feel are the keys to a successful business?

I think the keys to a successful business are having a clear idea of what you want to achieve, drive, determination and lots of hard work.  Running a business from home around a family also needs careful planning so family commitments don't suffer.


* What advice can you give other crafty women wanting to start their own business?

Pricing is one of the hardest things - as well as covering material costs, you need to allow for your time and it is really hard to set a price that will allow you to really be compensated for your time.
Originality of design is another important factor.  If you are going to be selling products made from someone else's pattern make sure you have permission to use the pattern and credit the original designer.  There are plenty of places to find inspiration, but whatever you are making to sell should reflect you as a craftsperson.  For example, both my dolls and sock monkeys are traditional toys that have been around for a long time.  I did however come up with my own patterns for the toys I make to sell, and I believe that I have added my own influence and style to these traditional toys.
You also need to consider the time that running a business takes up.  You may well love crafting but you need to be prepared for all the administration in running an online store.  Craft markets can be great, but will eat into your family time on the weekends too.
Having said that, don't be afraid to give it a go.  There are a lot of great places you can start to sell your product - madeit, etsy, and a lot of malls like the Crafty mamas Congo, Ozebaby and OzHandmade to name a few.

* Many people say "do what you love and the rest will fall into place". Do you think this is true?

Sort of - I think that if you love what you are doing, it is easier to do the hard work to make a success of it.


www.poppybeanandbloss.com.au


Thank you Michelle for sharing your insights with us!

If you have a crafty (or craft related) business and would like to be featured here please contact me.

Happy Easter!


Wishing you all 


                                       a very joyous, holy


                                         and most blessed Easter!

Interview with Posie Patchwork!

I have to admit I have an ulterior motive for presenting this interview. I get to pick the brain and receive some great advice from a successful and long admired crafty mumpreneur. I know how many other budding designers, crafters, sewers and artists there are out there who can benefit from and be inspired my Mums following their dreams to make a living out of their passions.

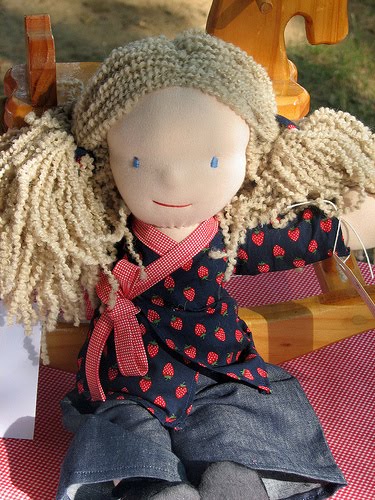
First up we have the talented Jennie from Posie Patchwork, enjoy the read.....


* What prompted you to start your business? 
  I was a new young mother in 1999, fresh out of Uni, with a husband away at war, so I started sewing more
seriously to stop myself from feeling lonely & I like having a project to work on.  I started selling to family, friends, word of mouth, then went full time after having twins in 2001 & started a website.  When my 4th child started preschool in 2007, I started a wholesale label too & attended markets on a more regular basis.

* What do you feel are the keys to a successful business?  
Finding a strong niche which you have a passion for, know your demographic, be original, fresh & add your own twist on new designs.  You have to know your style & be confident in your skills.

*What's next for your business?  
Well as Army life has it, we're moving in December to Brisbane, the 4th different state & territory I've started my business over in.  It's amazing how well supported you are locally & with good markets.  I'm actually cutting back, as we venture into high school & more deployments coming up.  4 children have a lot of homework & sport for one parent to manage.  I'd like to continue to do quarterly high end markets, perhaps start a small retail shop front, reduce & refine my range.


* What advice can you give other crafty women wanting to start their own
business?  
I highly recommend you have a clear & concise answer for when anyone asks "what do you do".  If you um & ah you don't sound serious, professional or convinced yourself!!  Be strong, say something like "I own a design studio where I produce handmade products made from an amazing range of fabrics from around the world" which really means you have a craft room at home, work around the children & order fabrics on the internet.

* Many people say "do what you love and the rest will fall into place". Do
you think this is true?  
Depends if you want to be able to say you are in business or want to make money!!  Handmade craft business is long hours, coming up with new styles & constantly trying to stay ahead of the growing competition.  I still love what I do after a decade in this profession, but I was patient, let it grow slowly, work around the children from babies to primary school & managed to get involved with some great PR opportunities - magazines, markets, stores & customers who spread the word.  My priority is my family, thus why I'm cutting back as they become teenagers & our family dynamic changes.  

Thank you to Jenny for being my first interview victim!
If you would like your business or profile to be featured here, please contact me.

This blog is closing!

All posts will now be found at my new site.  Click here to go the the new site.