Showing posts with label Kelly casanova weaving lessons. Show all posts

4 shaft weaving and sampling

This week I've been working on the sequel to my Introduction to Floor Loom weaving class.

This class will focus on 4 shaft weaving and begins with an optional sampler. I always felt that a sampler was a waste of time and effort, but I have definitely changed my ways! I do a lot of sampling, particularly now that I use a lot of my own designs and need to see and feel how the fabric is going to be before I put it out there to my students. Since I realised what a fantastic learning tool sampling can be, I always recommend it to my students. It can pretty much make or break a project!


Plus, when you're finished with a sample, you can either cut it up and use it for small project, or keep it to refer back to. Either way, it's useful!

The next part of the class will move onto 4 shaft kitchen towels,  which I designed. Each towel is a little different but equally lovely. 
We will weave 4 towels all together.


Here is a sample of the first towel, isn't it gorgeous? 
The towels tie in happily with my #weaveforme plans for April,  as I will be keeping them for my kitchen 😊

If you're interested in the next floor loom weaving class, make sure you are signed up to my email list for announcements and special offers. Instagram is also a great place to keep up with what I'm doing.

Do you have plans for your #weaveforme project yet? I'd love to hear about it!


Online Weaving School FAQ's

Have you been wondering about my Online Weaving School? Maybe you have visited already but feel unsure about where to get started? Today I am going to address some of my most frequently asked questions!

What is your Online Weaving School?

It's a place I've created online for weavers of all different levels and abilities to learn. Because the lessons are all online, the student can learn at their own pace, in their own time, and in the comfort of their own home.

How do I take a class?
You need to be registered and have an account to purchase classes. This is a simple process using your email and a password. Making an account does not cost you anything.
You can look through the classes available, read a little about them and view the curriculum. Many of my classes are available as single purchase classes and there are quite a few free classes you can take as well. 

What is a membership?
You can also purchase a membership. This gives you access to a library of classes and projects. Some of these classes are only available to members. Members are invited to join a special private Facebook group where we share photos, discussions and ideas. There are also occasional giveaways and live videos just for members.

What is the difference between a monthly and yearly membership?

If you want to purchase a membership, you have a choice of paying once per month or once per year. The yearly membership works out cheaper over the course of a year, but many also opt for the monthly membership, as they prefer paying a smaller amount regularly, rather than a lump sum. Whether you choose yearly or monthly, you receive the same benefits for the duration of your membership.

What classes are included in a membership?
Currently, all classes are included unless they are a feature class. At the time of writing this, the two feature classes are Three Heddle Adventures and Weaving Boot Camp, which are available as separate purchases.

Are memberships always open?
Yes, you can purchase a membership at anytime. 

What is Weaving Boot Camp?
This is a great opportunity for newer rigid heddle weavers, or those who have not yet gained the confidence they desire. The course runs over 3 weeks and is designed to get you going with your loom with step by step instructions and demonstrations. I have had many students tell me that this was the class that solidified weaving for them.

Is Weaving Boot Camp always open?
No. It opens several times a year, for a limited time. The best way to keep updated on opening times is through joining my email list.

Are all of your classes for the rigid heddle loom?
Most are. I do have an introductory class for floor loom weaving and am working on the second instalment right now. I also have plans for inkle weaving classes, more floor/table loom classes and classes that incorporate other fibre art techniques.


Is there a time limit to watching a class?

No. Once you have purchased a class, you have lifetime access and can view at your leisure. You can go back and rewatch as many times as you wish.

How is your Online Weaving School different to your Youtube channel?
Good question! Youtube is where the idea for my weaving school began. Youtube is mostly a short tutorial format and is fairly basic. My Online Weaving School is not just a learning platform, it is also a community. Classes are usually lengthy, with lots of video content as well as printable PDF's. The general rule is, if you like my Youtube channel, you will love my weaving school!

Any more questions I need to add to this list? Let me know if I've missed any and I'll either answer in the comments or update to include them in this list.

Happy Weaving!


What can I DO on a rigid heddle loom?

Perhaps a better question might be "What can't I do on a rigid heddle loom?". Yes, it's that versatile!

I already mentioned in the previous post that you can create more complex patterns by using multiple heddles/reeds. For example, if I want to weave a 4 shaft pattern, I can use 3 heddles/reeds to achieve that, as demonstrated in my Three Heddle Adventures class. Or, if I want to use 2 heddles I can also weave some really awesome patterns, as demonstrated in my Weaving with Two Heddles class. However, many rigid heddle weavers also achieve more complex patterns by using pick up sticks to manipulate threads that are threaded in the slots of the heddle/reed. You could think of these threads as "uncommitted", (not threaded in a hole) so free to play around with. One of the more impressive examples of complex patterns with pick up sticks is Jeen's Pinwheels, which is actually an 8 shaft pattern! You can see another great example of that on FarmNana.


My Midnight Shawl pattern uses 2 heddles/reeds to achieve a diamond pattern.

Another great boon to rigid heddle weavers is the use of Colour and Weave techniques. To break it down to a simple form, you arrange your warp and weft colours in such a way that, even though you're usually working plain weave, it can look like an impressive and complicated pattern.


My Log Cabin Table Runner is a good example of the use of Colour and Weave.


My newest Youtube video shows you what you can do by thinking outside the box. I show you how to make a wavy and a zigzag shuttle from cardboard, so fun!


Did you know that you can use your rigid heddle loom for tapestry too? You can read more about that in this post. I also share my tapestry thoughts in this video.


There are many possibilities with tapestry on the rigid heddle loom! This video series outlines the use of freestyle tapestry.


Krokbragd is one of my favourite weave structures, and is easily achievable on a rigid heddle loom. I have written about it, and have many videos on Youtube, as well as a few online classes. I just love it!

I could really go on and on because there is so much more you can do with this humble loom. Hopefully what I've written here has convinced you of the capabilities of rigid heddle weaving and given you some more material to look into.

Until next time...

Happy Weaving!


Tapestry weaving on a rigid heddle loom

Tapestry weaving is something I like to do just sometimes, when the mood takes me. Well, the mood did take me recently and I decided to follow one of my favourite themes that I haven't really explored yet - House on a hill, by the sea.

I wanted to do just small tapestries, as I planned on doing several variations on the one theme, and as a tapestry is a time investment, I thought the smaller, the better. I also have a soft spot for little things.

I warped my Sampleit loom with Ashford tapestry cotton, which is my go to tapestry warp. I used a 7.5 dent reed because that is the only size I have for the Sampleit, but a 10 - 12.5 dent reed would be preferable.

Each tapestry measures approximately 3.5" X 4".


 Tapestry 1 was woven with scraps from my stash bag. My very messy, tangly stash bag! It has smaller pieces or balls of all sorts of yarns from past projects, but mostly fingering to worsted weight.
Incorporated into this piece are pieces of wool, cotton, bamboo, silk, alpaca and some unidentified freebie from long ago.


For Tapestry 2 I was going for a "twilight" look, so I chose a limited colour palette of greens, blues, greys and muted colours.


Tapestry 3 was woven entirely with 8/2 size weaving thread in cotton and cottolin. I also chose a muted colour palette for this one.
It ended up being my favourite of the three, I like the look of the finer yarn and details. It took a good deal longer to weave due to the thin yarn, but it was so relaxing, I didn't mind at all!

I plan to do a couple more little tapestries on this warp, but they will have to wait until I have a bit more time.


*This is an affiliate link, which means that if you click this link and buy the book, I will receive a small commission. I only recommend books I have actually read and love.

A book that really helped me get started with tapestry is Tapestry Weaving by Kirsten Glasbrook. It is not a highly detailed book, which I think makes it great for beginners. She shows the basic techniques, gives projects for you to try and then later there are examples of her own work in a gallery. I have had this book for years and still refer back to it for information and inspiration.


I also have an Introduction to Tapestry online class, which is currently only available to members and is a great place to start out.

Also, in this Youtube video, I discuss why tapestry can be done on a rigid heddle loom, but why it's not entirely ideal. 

I hope you enjoyed this post, Happy Weaving!


New Krokbragd Bag Class!


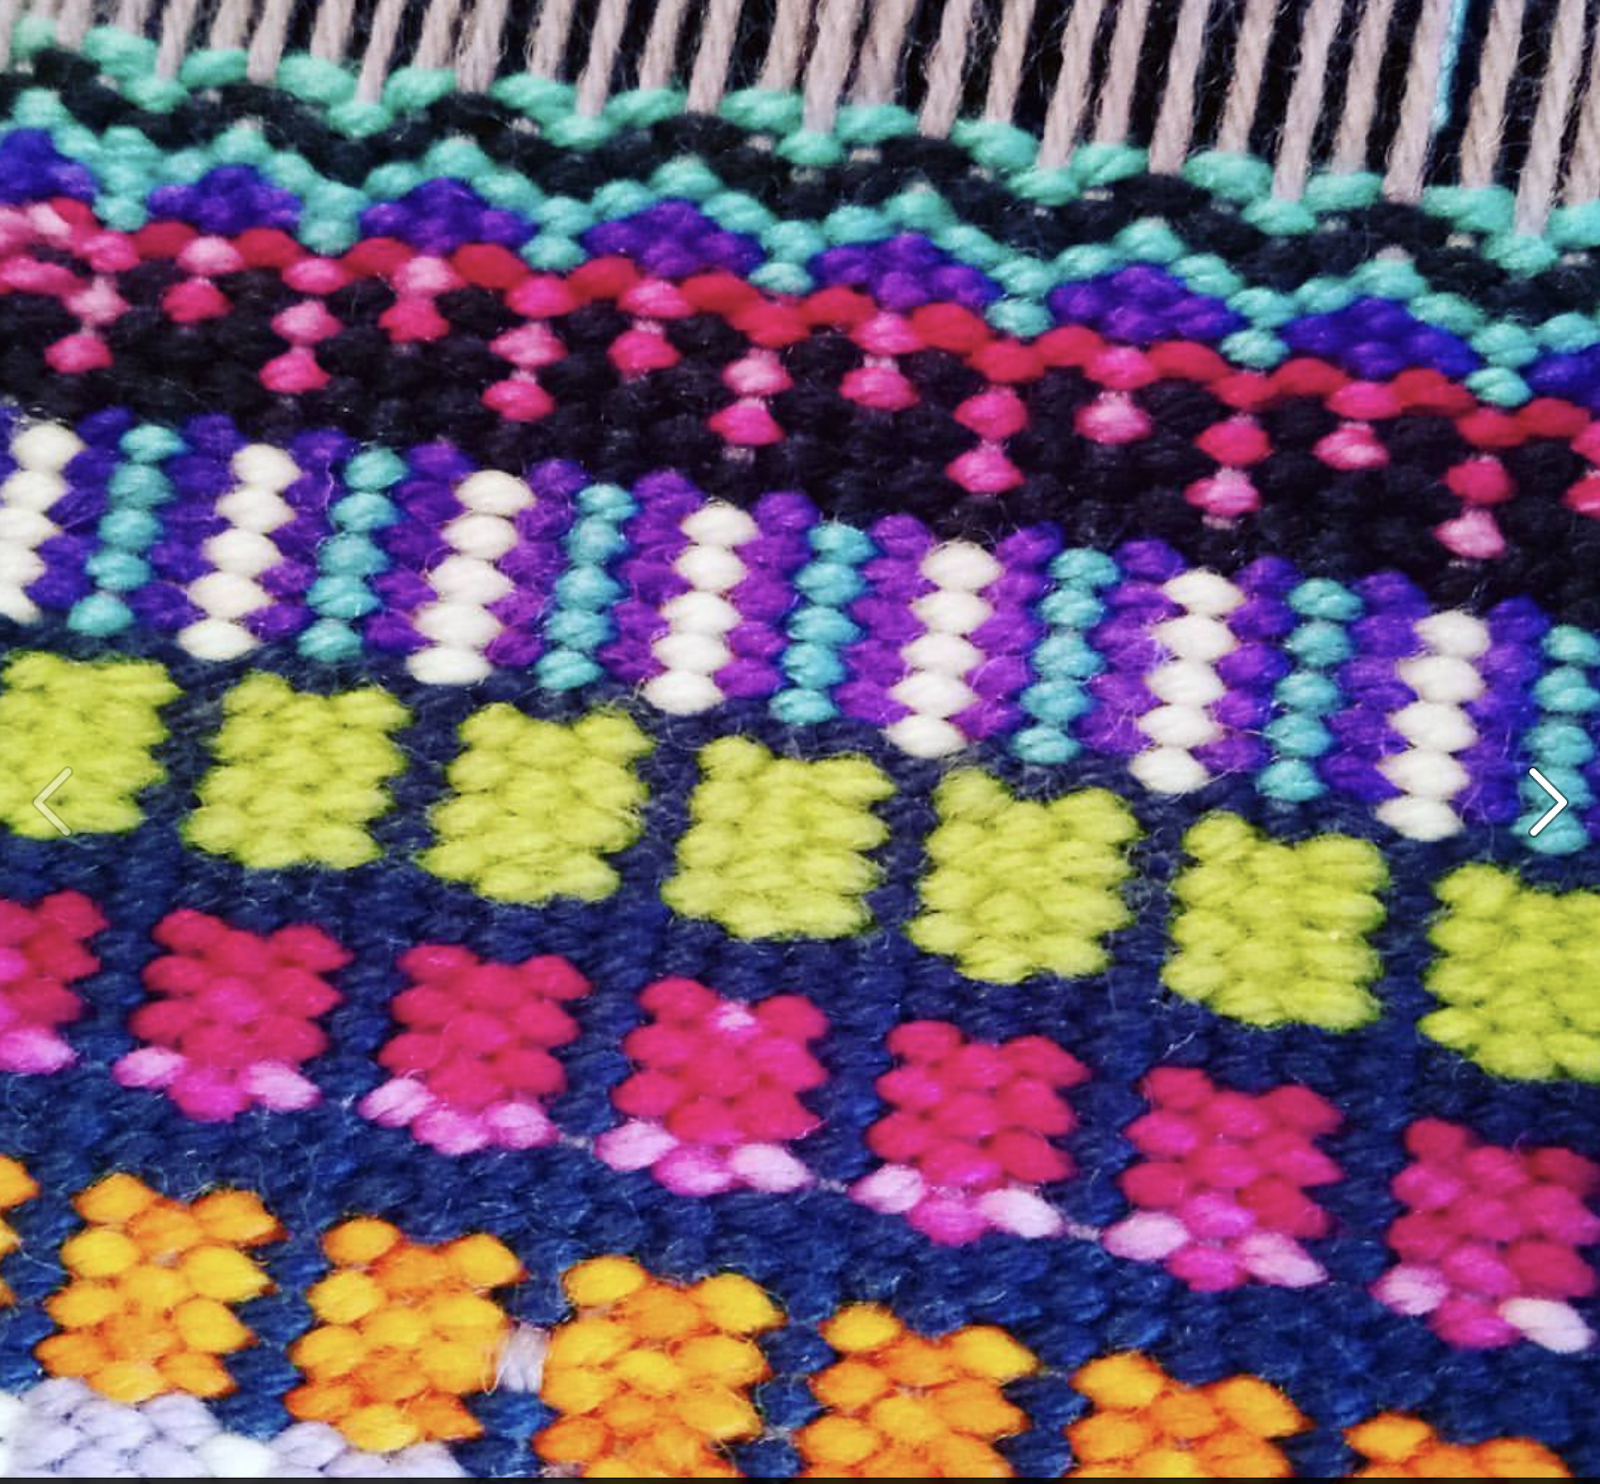
My brand new class is finished and available! When designing this bag, my plan was bold colour and design. I think I can safely say that I achieved that!


I used a contrast of deep, navy blue and a middle panel of bright colours and bold patterning to really set off the feature panel.


Originally I had a totally different design, but when I started weaving, found that it was a little more drab on the loom than it had been in my head. So, I whipped out the Sampleit, threw on a short warp and started experimenting with the colour palette I had chosen for the bag.


I was much happier with what I came up with on the small loom and although not all of this design made it into the bag class, I'm really happy with the finished bag - plus I have plenty of other designs up my sleeve for another time.


The idea for the bag actually came to my last year, when I was playing around with this sample below. It's not until recently that I actually got around to making the class.


The project uses two heddles and provides two different methods for threading, according to your preference. Full sewing and finishing instructions are also included in the class.

The bag pairs perfectly with my Krokbragd Mug Rug Weave Along that ran recently, so definitely start with the mug rugs if you're hesitant about giving this a go.

And, if you just want to find out more about Krokbragd, I have written this post which gives you more information, plus links to my Youtube videos on the topic.

I hope you can join me for this one, Krokbragd is so much fun, so rewarding and for me, is a weave with a total WOW factor!


Where it all started (long post!)

My 3 year Youtube channel anniversary came and went without my noticing back in August. I was looking through my list of 159 (!!) videos tonight and noted the date of my first video, way back in 2015.

While these years have flown so fast and so much has happened since I hesitatingly uploaded that first video, I thought it a good time to reflect and share a bit more of my journey with you, particularly if you have only found me recently.

Some of you have been with me almost since that first video, and I believe that I have most to thank you for. It is the first viewers who encouraged me to make more videos, who threw amazing compliments in my direction, and who have shown me so much love these past 3 years.

So, lets go way back to the beginning. Before weaving, I had many, many crafts under my belt. One of them was knitting, which I used to indulge in a great deal until a painful shoulder Repetitive Strain Injury reared it's ugly head and left me just a "sometimes knitter". Anyway, I had learned an immense amount of helpful knitting techniques from kind people on Youtube. When I had been weaving for some time and was really excited about what I was doing and learning (still am!) I had the idea of contributing to the Youtube craft community by sharing a little of what I knew. I borrowed my son's little camcorder, and, with pretty poor visual and even worse audio, I recorded this Waffle Weave on a rigid heddle loom video.


I didn't expect that many people would watch it, and that was fine by me, I just wanted to share with anyone who may be interested. It wasn't long before I started getting comments and very positive feedback. People were asking me to make more videos and I couldn't believe it. Me? Introverted, dull as dishwater housewife me? I was pretty astounded at the response!

I made some more videos and I discovered something about myself. I loved teaching! I had taught my kids at home for a long time (my oldest homeschooler is now 18!), but this was teaching adults something I was really passionate about and I wanted to keep doing that!

As I made the videos, the cost of materials started adding up and I had no job or real income at this time. Youtube had a "paid channels" feature and so, I started one. I charged roughly $2 per person, per month and this enabled me to keep going because people joined and paid. 

In my "spare time" I started putting together some weaving designs to sell in my Etsy shop. I now have 10 designs, and once again, I've been amazed at the response. I also love designing and look forward to continuing doing that. 

Back to Youtube, where it was abruptly announced that the paid channel platform was closing. This left me with a quandary - should I try to find another platform or is this a sign that I should close down. Well, my students came to my rescue and begged me to continue. A short time later, I found a great hosting platform - Teachable and have been with them ever since. Youtube closing the paid channels was a HUGE blessing in so many ways and has allowed to go forward in ways I could not have imagined. If you haven't seen my Online Weaving School, please check it out to see what I'm talking about! 

I now have 40 classes available, including my first floor loom course. Being on a professional platform has challenged me to do better and construct my classes to give students an optimal learning experience. I must be doing something right, because the school continues to grow and I continue to get awesome feedback. Some months I now earn a full time income, which is a dream come true.

All of this has been made possible because people like you support me in so many ways. You support me with your enthusiasm for weaving and learning. You support me financially, which allows me to continue to grow this little business. You support me on a personal level with your kind messages and many prayers over the years. 

A topic that is often discussed in business circles is "success". Success to many, seems to be when you reach 6 figures, as though there is some magic monetary value that means you have made it. Well, if success comes down to 6 figures, I'll leave it, thanks all the same. Am I successful? Yes! Do I earn 6 figures? No, and probably never will. I earn a living (maybe not a lavish one by the opinion of many, but it helps to feed and clothe my family!), I get to do what I absolutely love, and I'm surrounded by wonderful, supportive people. 
Am I successful? Heck, yeah!

I want to thank you all for making this happen. I had no idea that I was capable of running a business that began with a hobby and a passion. My hope is that I can continue to do this for the rest of my life, and with all the plans and ideas I have for my online school for the future, I shouldn't have too much trouble achieving that goal!

God has blessed me abundantly through this venture, I pray He blesses you too!


Weave Along Round Up

The Krokbragd Mug Rug Weave Along (try saying that with a mouthful of cake!) has been a great success! While many students are still working on their mug rugs and some have yet to start, I have been seeing so many wonderful photos of their work, that I couldn't wait to share.

What I really love is the variety of mug rugs I'm seeing and the range of interpretations of my original design.


Charlotte, who has been with me a long time, and is a very prolific weaver, came up with several variations on the original design. She even figured out how to weave sheep and then shared the draft with the other students, several of whom were inspired to weave their own sheep!


Mary went with some darker colours and white highlights. So lovely!


This is one of Kelly's (a different Kelly!) interpretations. I love that she included many different colours, but that they all work together so harmoniously.


And another, different rug from Kelly. You can see Charlotte's sheep and my tulips (from this Youtube tutorial).


And finally, these beauties from Connie. So lovely!


Robyn decided on a bold and traditional design for this mug rug. Love the colours!

Perhaps you're looking at all these gorgeous mug rugs and wishing you had joined in? No problem, you still can! 
All the details are here.

Thanks to everyone who joined in and threw themselves into the challenge with such gusto, it has been so exciting for me to see.

This weave along leads beautifully into the next class, which will be a krokbragd bag with two heddles. I'm working on that right now, it should be ready in a couple of weeks.

Until next time....

Happy Weaving!


Monk's Belt Magic!

Sampling can be a sensitive topic among weavers. Why, when it takes you so long to set up and weave a piece, would you subject yourself to dressing your loom "just for a sampler"? 
Believe it or not, as a newer weaver, those were my thoughts exactly. When I read or heard a teacher recommending sampling before beginning the actual project, I would secretly snicker to myself "yeh, right, as if that's ever going to happen, I just want to get to the REAL weaving!"

But if there is one thing that weaving has taught me over the years is patience! Oodles of patience. And, I've messed up enough times to know that, at least for some projects, sampling is a super good idea.

So, that brings us to my recent Monk's Belt sample. Monk's Belt is a very old weave structure and has been used in a variety of ways, according to time period and types of looms available. 

My sampler used 4 shafts and 6 treadles. The threading is quite simple, as you thread in blocks, which means there is plenty of repetition. My warp is 8/2 cotton, sett at 20 epi. The finished sampler measures 7 x 44". Tabby is used throughout.


Monk's belt designs are usually instantly recognisable, due to the bold, geometric shapes created by series of floats (these are where the block threading comes in). My aim in doing a relatively long sampler was to give myself plenty of time to experiment with treadling, but especially with yarns. I started out with yellow, mercerized cotton. I quickly found that this was not ideal, as it tends to sit quite straight as a float, rather than blooming and blending with itself. I also found that a single weft was not sufficient to make the pattern pop, so for each subsequent yarn type, the weft was doubled, to a much better effect.


The blue in the above photo is bamboo, which I found to be one of the most optimal yarns due to the thickness, sheen, softness and beautiful bloom.


The multicoloured weft above is hand dyed tencel, which gave a lovely effect, but like the mercerized cotton, doesn't quite stack up in the "bloom" department. 


Bamboo again, and you can really tell the difference, it's as though it was made for this! I had been following some standard treadling, but for this one I started branching into my own treadling, writing it down as I went.


I had been using single colours and decided to try 2 colours for the blue/green part above. I love the effect of 2 colours! Technically, I was using 3 colours if you include the purple (warp colour) I used for tabby.


Ah, silk! I combined orange and magenta 60/2 silk and my own treadling pattern for this one. Even though the silk is very fine, as a doubled weft it gave very good coverage. The blend of colours is also very eye catching.


For this one, I went back to my green bamboo for the pattern weft, but instead of using my purple 8/2 cotton for tabby as I had previously, I changed to my 2 strands of silk. This gives the effect of cute, luminous dots among the main pattern.


I have had some gold chenille sitting on my shelf for a while, and thought "aha!" Perfect time to try it, this will look brilliant. Except it doesn't! I had pictured something quite sophisticated looking, but instead got strange. furry caterpillars that look slightly "off" in colour.
Not that I mind, this is the beauty of sampling - now I know that I don't like chenille in a block weave!


The blue at the top is bamboo once again, but this time I swapped out the purple tabby for green bamboo. It gave an interesting effect but the green bamboo was a little too thick and kept my weft floats apart more than I would like. However, the texture is pretty cool and really changes the look of the weave.


The versatility of Monk's Belt is awesome. Because you are set up for plain weave (tabby) as well as the pattern, you can break them up and just use the pattern as a border if you wish. I think plain weave towels with a border such as the one above would be really striking.


More treadling and yarn experiments, there is just so much you can do!


The big test was how the fabric would feel after wet finishing. I suspected that it would be quite stiff and more suited to cushions, bags etc. But, happily, I was wrong. The fabric softened up wonderfully and has a lovely drape. It looks great on the back too. It struck me that a sampler like this, with a bit more length, would make an amazing scarf!

I hope you enjoyed this post. I have made a companion video just for my Weaving School members, where I go over this blog post in more detail. If you are a member already, you will find the video HERE.

If you wish to join up, I would love to have you! Monthly and Yearly memberships are available and include hundreds of hours of classes, access to a private Member's group on Facebook, giveaways, live videos and a wonderful community of weavers.

And, just before I finish up, I have a couple of book recommendations for you. These are affiliate links, meaning I get a small commission if you click through and purchase, but I do actually own and love these books.


Anne has a couple of pages on Monk's Belt, different threadings and treadling options, as well as excellent photos to show you how the weave looks.


Marguerite has quite a few pages on Monk's belt with a lot of different drafts. The drafts in this book can be a little more difficult to read if you are not accustomed to reading older drafts.


The week in review, phew!


The week started out well and then WOOSH, I turned around and it was almost over already. A lot of weeks are like that these days. But it doesn't trouble me, as long as the week is well spent.

Autumn is well and truly upon us and the cold has crept in. This does not trouble me either, I am quite fond of cool weather and it inspires me to surround myself with fibre.


We celebrated our son's 18th birthday with much cheer and delightful dishes. I was reminded of the great blessing he is to our family, and what a fine young man he is. It is certainly bittersweet having your children grow up.


I finally launched my newest class, Rigid Heddle Garment Making! I was so thrilled to finish what had become a lengthly undertaking and I was so happy with the end project.


The response has been enthusiastic, as many students have been asking me to put this class together.


In other weaving news, this is what I have on the floor loom. The warp is plain white cottolin and hemp and I'm changing up the cotton weft colours as I go. The draft is an 8 shaft from Carol Strickler's 8 shaft pattern book. It took me ages to get going with this and I had to re-sley the reed THREE times due to silly mistakes. I'm happy to say that the weaving is all going smoothly! I'm making a set of towels.


The threading is rose path and the weaving is very much like an overshot - one pattern pick (red)...


followed by a tabby pick (white). Rather lovely!


I almost forgot, I also have a new Youtube video! The topic is a very popular one - weaver neater edges. 

So yes, a very busy week indeed with lots happening.

I have two new projects in the planning stages. One will be my next Etsy pattern (speaking of Etsy - my sales passed 400 this week and continue to climb!), the other will be a new online class with a difference. You will have to wait and see what the "difference" is, I have a lot of work to do before I reveal more details!

I hope you have had a great week, rich with blessings, family, good health and of course, a good dose of weaving!


Spring Table Runner Weave Along!

Recently, my Youtube subscriber count passed 12,000 (isn't that amazing?!) I decided that it was a milestone worth celebrating with a weave along. After consulting with my weaving friends, I came up with a design for a Spring Table Runner. I'm thrilled to bits with the ends result!


The weave along starts next week, but the introductory video can be viewed now, and the PDF pattern is available to download, giving you some time to collect your yarns. And if you miss the start, don't worry, you can join in when you're ready.

Make sure you're subscribed so that you don't miss the new videos as I post them, and I will also be sending out newsletter notifications, so be sure to sign up to my email list.

By the way, if you haven't entered the giveaway yet, there is still time!

I hope you can join me, this will be fun!

Fear of the loom!

I am sometimes surprised by the fear that can exist in newer weavers (and often not so new weavers as well). The fear that you will get stuck and not know what to do, the fear that the project won't turn out the way it's supposed to, the fear that you are not smart enough to learn how to use your loom, the fear that you will waste yarn if you make a mistake... I could go on.


I know people who have abandoned a new loom into a corner, a spare room or (dare I speak it?) a dusty garage. The fear is too great to make a start and they feel they have failed before even beginning.

I say that I am surprised, but I really shouldn't be. All it takes is a few moments of thinking back to when I was a new weaver. I was so excited by this beautiful piece of equipment, but silently terrified! What a privilege, but what a responsibility! 


Is that fear still with me? No, although I do sometimes feel an apprehension when trying something new with very expensive yarn!

So, how to rid yourself of the fear? It's actually very simple. You arm yourself with the knowledge you need and you practice! Read books, find resources, take courses, find weavers, join groups and network. And practice! Start simple and work your way up. Think of how an athlete trains. That is you, at your loom. Training, practicing, learning from mistakes and building knowledge.


If you do this, the magic will start to happen. That magic is CONFIDENCE! And with confidence, the sky is the limit.

If you are at that frozen with fear stage with your loom, perhaps you need some extra resources to help you out. 

My Youtube channel has a plethora of videos to help you get started in weaving.

My Online Weaving School is a great place for learning and gaining confidence. 

My Facebook Group is a friendly and welcoming place for weavers of all levels.


I hope this post will inspire you to go out there and weave beautiful things!


This blog is closing!

All posts will now be found at my new site.  Click here to go the the new site.