New Introduction to Floor Loom Weaving course

I am so excited to bring you the news that this course is now available! The Introduction to Floor Loom Weaving course is my biggest class yet, with almost 4.5 hours of video instruction plus printable PDFs.


I designed this course for new floor loom weavers, or those who simply want to "make friends" with their loom and gain confidence weaving. 
The topic list is huge, but includes loom anatomy, calculations, reading drafts, warping, dressing the loom, the mechanics of weaving, and much more! 


The course is project based so participants will end up with a beautiful 3 shaft double cowl scarf. 

I hope to make follow up classes to take students through 4 and 8 shaft projects in the near future.

If you're interested in this course, visit my Online Weaving School, where you can watch a preview for the class. It is available as a single purchase, or, if you are a subscriber, this course is included in your subscription, simply login to view.

Happy Weaving!

What is krokbragd?

Krokbragd has captivated my weaving heart and mind ever since I first laid eyes on it. So, what is it? And how is it pronounced?!

Krokbragd is a twill weave structure that originated in Sweden. It is woven on 3 shafts and is weft faced (meaning the weft is dominant, covering most of the warp).  It is pronounced "croak-brod".

This weave structure produces bold and colourful patterns. The actual weaving sequence does not change, so the patterns are formed by changing colours. It's quite magical!


The more you experiment with krokbragd, the more you feel that the possibilities are really endless.


Because the weft is packed in, krokbragd produces a dense, heavy fabric. Historically, in Scandinavia, items with this structure were mainly heavy duty pieces such as chair and travel cushions as well as for warmth in the form of bed coverings. It was also used artistically, mainly for wallhangings. It is likely that some wallhangings served a double purpose of keeping the home more cosy, as hangings were sometimes used as door coverings to keep out cold draughts.


If you find this weave structure as fascinating as I do, you may want to visit my free krokbragd tutorials for the rigid heddle loom on Youtube.


Start with the beginner's video here.
From there, you can find your way to the other videos that will help you build on the technique using a heddle rod.


Last year, I wove some samples with 2 heddles for a class I intended to complete for my Online Weaving School. Well, life got in the way, and the class didn't happen, but it's definitely on my list for this year, I'll keep you posted on that one!


Easy, natural hand softener


It's Winter time for many of my students throughout the world, and I know how drying that can be on your hands. If you work with your hands, it's an issue - you will have threads catching on dry skin and if it gets bad enough it may become painful to use and wash your hands - not nice!


So today I am sharing with you an old embroiderer's trick to smooth and silky hands in no time, using  natural ingredients that most of you should have in your pantry. And, it really works!


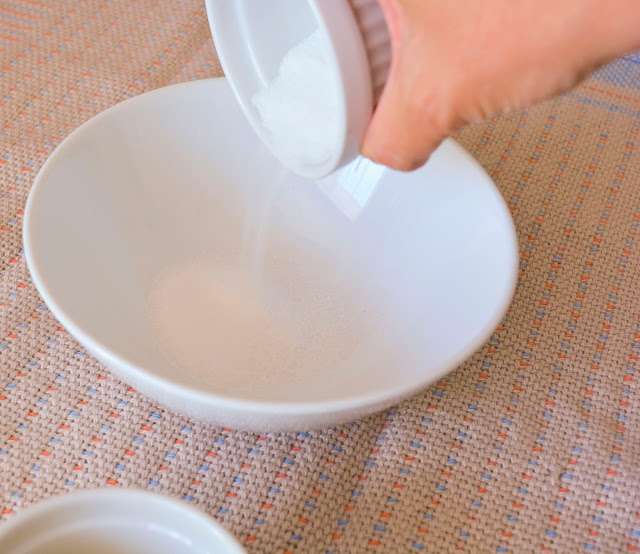
2 tablespoons white, granulated sugar
2 tablespoons olive oil
Yep, that's it!


Mush the two ingredients together in a bowl until it comes together.  Now, with both hands, rub the mixture all over the fronts and backs of your hands. There is not set time for the rubbing, but if you do it too long it may over exfoliate and start to hurt - less is probably more!


Wash your hands in warm water (you may need just a little soap to help dissolve the excess oil). Pat your hands dry with a nice soft towel. Follow up with a moisturiser if you wish, though I don't find it necessary. Enjoy your soft and silky hands!

P.S. This towel is the underside of one of my hand woven Lux Hand Towels, the pattern is available in my Etsy shop.

Easy, frugal, bread, onion and tomato bake

This is such an easy and economical dish and had the added bonus of using up some ingredients that might be past their best.


There is no need to be exact with quantities either, it's that sort of dish.

I started with some thick slices of homemade bread that was slightly stale and buttered each slice lightly. Cut into cubes.
I chopped 1/2 a red onion.
I chopped roughly 10 tomatoes that were getting a bit old but still perfectly useable.
All this goes into a bowl together and drizzled with some olive oil. Sprinkle with garlic salt if desired and season with pepper.
I tipped all this into a baking dish and sprinkled with a little parmesan, then grated tasty cheese.
Pop into a hot oven (about 180 degrees C or 350 F) until golden brown on top.
Serve!

This blog is closing!

All posts will now be found at my new site.  Click here to go the the new site.