Showing posts with label Recipes and food. Show all posts

Anzac biscuit recipe


This recipe was passed down from my husband's Grandmother. There are many Anzac biscuit recipes but I really like this one, and I love to think of my husband's Gran baking these in a warm kitchen on a wood stove.


Yield: About 30 medium sized biscuits

Gran's Anzac biscuits

Golden and crunch, easy to make and delicious to munch on!
prep time: 12 MINScook time: 15 MINStotal time: 27 mins

ingredients:

Ingredients
  • 1 cup plain flour
  • 1.5 cups rolled oats
  • 1 cup desiccated coconut
  • 1 cup white sugar
  • 170 grams (6oz) butter
  • 1 tablespoon golden syrup
  • 1 teaspoon bicarbonate of soda (baking soda)
  • 3 tablespoons boiling water

instructions

Method
  1. Mix dry ingredients together in a bowl.
  2. Melt the butter and syrup together.
  3. In a cup, pour the boiling water over the bicarb soda and mix.
  4. Pour water and soda mix into butter mixture.
  5. Pour over dry ingredients and mix well.
  6. Use a dessertspoon to portion out the dough onto a baking tray lined with baking paper. Leave room for spreading in between biscuits.
  7. Bake for 15 - 20 minutes at 160 degrees (C) or 320 (F) 
  8. Allow to cool on tray until firm enough to move to a baking rack.
Created using The Recipes Generator

Easy flat bread recipe

When I need bread in a hurry, I make flat bread! It is quick, cheap, easy, and means I can have fresh bread in under an hour. I often serve it as a wrap with salad, meat, dip, falafels - whatever, it's all good! And if you have leftovers, the next day you can toast it into healthy chips for dip or use it as a pizza base.


Ingredients:
4 cups plain, unbleached flour
2.5 teaspoons yeast
1 teaspoon salt
350 - 450ml warm water

Place dry ingredients into a large bowl and mix. Make a well in the middle and add the water, about half at first and increase as you need to. You may not need all the water - it depends on your climate and the dryness of your flour. You want a very moist, but not sloppy dough. Mix until the dough comes together and there are no dry spots remaining. 

Turn the dough onto a floured surface and knead for a couple of minutes, until the dough is soft and supple. Flour or oil the bottom of the bowl and place the dough back in. Cover with a clean tea towel.
Allow to rise for approximately 45 minutes to 1 hour or until doubled in size. Once again, this time will vary according to your climate.

Once the dough has risen, cut off lumps of dough about as large as the palm of your hand.
On a well floured surface, flatten the dough first with the palm of your hand, turning it over the coat both sides with flour. 
Now roll the dough out until you have a round that will fit in your pan and is quite thin, but not too thin to pick up and transfer to the pan. (I just pick it up with my hands).
Place the round into a preheated, very hot non stick frypan. Do not add an oil - we want a dry fry.
When the surface of the round begins to bubble and puff, turn over to cook the other side. It only takes a minute or two on each side. You may have to adjust the heat as you go to ensure the bread cooks quickly but doesn't burn. Every few rounds, you may wish to  quickly wipe out the surface of the frypan with wet paper towel or a damp cloth as flour can accumulate and start to burn. 

Stack your bread rounds on a plate and cover with a clean towel until ready to use.


My kids love to eat them fresh out of the pan, smothered with butter! If I can keep them out of the kitchen for long enough, I often serve this bread with homemade hommus or labneh.


I would love to do a video to accompany this flat bread recipe sometime, would that interest you? Let me know!

Whey, sourdough, yeasted - what should I call this bread recipe!

I've been playing around a lot in the kitchen lately. Grinding grain, making lots of good food from scratch, preserving, culturing, what fun!

I made this bread as an experiment today and it was a success. It's a little unconventional in the combination of ingredients, but it works, so here is the recipe!


Whey Loaf (I decided on a simple title!)

Makes 2 loaves

Ingredients
450 grams wholemeal flour (freshly ground if possible)
50 grams rye flour
500 grams white plain flour
2 teaspoons yeast
1/4 cup sourdough starter
200ml whey, room temperature
2 teaspoons salt
2 tablespoons of honey
3 tablespoons sunflower oil
500ml warm water

Method

Place all dry ingredients in a large mixing bowl. Add sourdough starter and whey. Start up your mixer with a dough hook (or mix with wooden spoon if mixing by hand). Mix honey and oil with warm water and gradually add to mix. Continue to mix on low for 10 minutes, or mix by hand until combined and then knead for 10 minutes or until elastic.

Place dough in an oiled bowl and cover with glad wrap. Allow to double in size (usually an hour depending on the weather).

Divide dough into 2 loaves and shape either into bread tins or into rounds on a tray. If using tins, be sure to oil them or for trays, use good quality baking paper to avoid any sticking. Cover with glad wrap once again and allow to sit for another 45 minutes - 1 hour.

In the meantime, preheat oven to 250 degrees (C).
Slash tops of loaves with a sharp knife or razor blade and place in oven. Set the timer for 5 minutes. 
Turn oven down to 220 deg (C) and bake for a further 30 minutes*.
Turn out and cool on wire rack.

* Due to the wholemeal flour, your loaves may brown more than you would like. If they start to brown too much, cover with a large piece of foil for the remainder of the baking time.


Labneh

I may have a new addiction. Labneh. I made some from my homemade yoghurt and all I can say is wow. If you've never tried it you really should!


I started with 1 kg homemade yoghurt. I've detailed one method here and my current preferred method here for making your own yoghurt.

I have written instructions for labneh in the past but I like this way of doing it more, it's easier and it makes more sense to use a colander.


So, you have your large square of muslin lining the colander and just dump your yoghurt in the middle. Have the colander set over a bowl or container to catch the whey.

To keep the muslin tidy and to let gravity work for you, tie the corners of the cloth loosely around a wooden spoon handle so that it is slightly suspended. 


Place in the fridge and leave for 24 hours. Make sure your bowl or container is big enough to collect the whey, or pour off the whey occasionally so it doesn't overflow (don't get rid of it though, it's precious! More of that in a future post.)
Unwrap the labneh. Stir in half a teaspoon of good salt and whip it up a bit with a fork. Now it's ready to store in an airtight container in the fridge. There are so many ways to use it - my favourite is to spread generously on a slab of homemade bread drizzled with some extra virgin olive oil or to place globs of it in a yummy salad. You can roll balls of it in herbs and place in olive oil. Just digging a spoon into it is a major temptation! 

With homemade yoghurt, labneh is a mild, creamy, healthy delight that you may well find as addictive as I do!

Whole wheat raspberry and banana hot cakes


I got a grain mill! Yes, the 10 year wait was worth it, it is a Hawos Billy 100 and it's really wonderful. It was a huge toss up between electric and hand operated, but I'm so glad I went with electric as I think having to hand grind would put me off wanting to use it.

Today I have a recipe to share that I made with my first batch of freshly ground wheat. Wow, what a blessing to have food that nutritious and delicious!


This was my healthy lunch experiment for the kids and they turned out so beautifully! The children quickly became like lions to the prey, they absolutely loved them. Moist, fluffy and so healthy!


Ingredients

4 cups of freshly ground whole wheat flour (or packaged whole wheat flour)
2 tablespoons LSA mix (ground linseed, sunflower and almond)
4 teaspoons baking powder
1 teaspoon cinnamon
5 egg whites, beaten until stiff
1 egg yolk
1/4 cup of date syrup or honey
1 over ripe banana, mashed
3 cups milk (full fat, low fat or skim are fine)
2 tablespoons natural yoghurt
1/2 cup raspberries (I used frozen)

Method

Place all dry ingredients together in a large bowl. 
Beat egg whites until stiff.
Whisk together egg yolk, syrup (or honey), banana, milk and yoghurt. 
Pour these wet ingredients into the dry and mix thoroughly. Fold in the beaten egg whites along with the raspberries.
Fry in a hot, non stick pan or a regular pan with a little rice bran oil to prevent sticking. 

Serve warm. I served with a dollop of yoghurt, dusting of icing sugar, raspberries and drizzled with maple syrup.
For a special dessert these would be awesome with whipped cream or ice-cream and raspberry coulis. 

Prickly Pear syrup recipe


I've been doing some research into Navajo natural dyeing techniques - prickly pear fruit with it's fabulous, vivid magenta to strong pink colour would be an obvious choice. 

I was afraid of the possible, painful consequences of harvesting the fruit, but following some instruction from my somewhat experienced husband, I went ahead and I'm so glad I did. Harvesting and preparation instructions are here.

Not only did I pick and prepare enough fruit to start my yarn dyeing experiment, I also came up with a delicious syrup! Here is the recipe for you:


Ingredients:
1.1kg ripe prickly pear fruit
500grams white sugar
1 teaspoon citric acid

Method:
When the fruit is prepared and peeled (see harvesting and preparation method here) chop each fruit into 3 and blend in a food processor. No food processor? Place in a bowl and mash really well with a potato masher. Place a strainer or colander over a large saucepan. Strain the juice, leaving the seeds in the strainer. Use a spoon to push through all that goodness. 
Once you have your juice, add the sugar and citric acid. Warm over a low heat until sugar in dissolved, then increase heat to medium until the liquid comes to a light boil. Boil for no more than 5 minutes.
Allow to cool, poor into a glass bottle or similar and keep in the fridge.


Uses:
Can be used as a cordial, just mix with water, mix with mineral water and ice for a refreshing drink, drizzle over ice-cream, yoghurt, pancakes, waffles or fruit salad. Anything you would use a fruit syrup for, this syrup can be used.

Hope you enjoy it!


Harvesting and preparation of prickly pear fruit.

Ouch! Yep, those little spikes hurt and there are plenty of them. But don't let that deter you - the prickly pear has delicious fruit and you can even eat the paddles (leaves also known as napales) but in my opinion that is an acquired taste, as in, one that I personally have not acquired!


What you need:

Good quality kitchen/washing up gloves. The good quality part is important, they are tougher! *See note.
A plastic bucket
Long handled tongs
Small, sharp paring knife
A large mixing bowl or similar to put your peeled fruit into.
Plastic bag
Water

What to do:

This first part is completed outside.

Half fill your bucket with water. Stand back from the cactus (the long handled tongs give you further reach). The hair like spines (glochids) will begin to come off as soon as your tongs touch the fruit, so be aware of where they are falling. For this reason it is better not to harvest on a really windy day.
Grabbing the fruit with the tongs, give a twist or two and place the fruit straight into the bucket. Continue this process until you have the number you require. Make sure the water is covering the fruit.

Now tip the water out, somewhere that no one is likely to walk or weed etc. Using a hose, spray water into the bucket onto the fruit, covering it once more. Tip out once again. You can repeat the spray and tip one more time (I do).

Put on your gloves. If your gloves are strong you should be fine to pick up the fruit now. Cut off each end and make a slit down the centre with the knife. Begin to peel back the skin from the slit until it is all removed. Place the skin either back in the bucket or straight into the plastic bag. Place the peeled fruit into the bowl. Continue for all fruit.

Now you can take the fruit inside to use. I give one last rinse in water just in case there are any remaining spikes. It is delicious fresh or there are lots of interesting recipes to try (I have a prickly pear syrup recipe coming soon!)

Clean up:
I throw all the peelings into the regular rubbish bin in a plastic bag. As far as I know, the peelings can not be composted due to the spines - I certainly don't want them ending up in my compost. If you have successfully composted peelings, I would be most interested to know.


* I used good quality kitchen gloves to prepare the fruit. After working in the kitchen with the peeled fruit, I went back outside to clean up the peelings. However, I put on a different pair of kitchen gloves, a lower quality, thinner pair. As soon as I touched the bucket with the peelings, I got spiked. So it really is worth having the good quality gloves!

It's cheap, it's healthy, it's No Bake Date Slice!


I love medjool dates but unfortunately, at around $20 a kilo they're a bit much for our modest budget. I thought I'd start experimenting with the much cheaper (at $2.99kg) dried, packaged, pitted dates.
And I've had success! This is a delicious, healthy and economical treat. I love to have a piece in the middle of the day or in the afternoon with a cup of tea and the children love it too.


Recipe

40 dried and pitted dates
1 cup desiccated coconut
1 cup rolled oats
1.5 tablespoons cocoa powder
1 tablespoon tahini
1 tablespoon honey
1 teaspoon vanilla extract
2 - 3 tablespoons date syrup *see method

Place dates in a large bowl and add enough hot water to just cover the dried fruit. Soak for at least an hour, longer is fine.
Strain dates, reserving liquid. *This liquid is your date syrup.

Place all ingredients into a food processor and blend thoroughly. 

Press the processed mixture into a tin or container lined with non stick baking paper (I use a bread loaf tin). Let the baking paper fall over the edges of the tin, this makes it easy to pick up later. The back of a spoon is useful for pressing. Sprinkle with extra coconut if desired.

Place in the fridge for at least 2 hours to set. Take out of tin using the edges of the baking paper to pick it up. Cut into squares and keep in an airtight container in the fridge.

Note: Date syrup is also delicious on yoghurt if you have leftovers and can also be used as a sweetener or topping for fruit.


Healthful Toasted Muesli


I know, I know, there are thousands of recipes for toasted muesli (or granola) on the internet. But I've been fiddling around to try and make a healthy, not too oily, but not too dry recipe.


And I've hit on something pretty darn good! There is the base recipe, but then you can add to that according to what you have at the time. This batch was timed to coincide with a visit to a Lebanese nut shop, so we had a lot of extra delights to put in.


Base recipe

5 cups rolled oats
1/4 cup honey
3 tablespoons olive oil
1 cup shredded coconut
2 teaspoons vanilla extract
1 teaspoon cinnamon
1 egg white, lightly beaten (optional)
1/2 cup sultanas

Preheat oven to 170 degrees (C). Mix all dry ingredients in a tray with sides so it doesn't spill. A roasting tray is ideal. Warm the honey until runny and mix in olive oil and vanilla. Pour evenly over dry mix. Mix thoroughly. Now pour over the egg white and mix thoroughly. Place tray in the oven and set the timer for 10 minutes. After 10 minutes, take out the tray, turn the ingredients and return to the oven. Repeat until the muesli has baked for 30 minutes. Remove from oven and stir in the sultanas.

Add ins (examples of)

1/2 cup chopped peanuts
1/4 cup chopped almonds
1/4 cup sunflower seeds
1/4 cup chopped macadamias
1/4 cup chopped cashews
1/4 cup pistachios 
1 cup LSA mix
Chopped dried fruit eg. apricots, peach, paw paw, apple, dates, cranberries

Rules for add ins

*For seeds and nuts, add these in at the dry mix stage. 
*For dried fruit add ins, mix in when the muesli has finished baking.

Allow the muesli to cool before placing it in an airtight container. Serve with milk or use as a delicious topping on stewed fruit and yoghurt. Also makes a delightful gift when placed in an attractive jar :)

Cauliflower muffins


They're not actually muffins, but I don't know what else to call them. They were a happy accident. I was steaming cauliflower with the intention of crumbing and baking. But I had too many things going at once and oversteamed it so it was soft. Wondering what to do, I tried this experiment and it worked! 

Ingredients
1 cauliflower, broken into florets and steamed until fairly soft
2 eggs
3 rashers of bacon, chopped into small pieces
parmesan cheese - the amount varies to taste, but 1/4 to 1/2 cup roughly
Breadcrumbs to top
salt and pepper

Preheat oven to 180 degrees (C). Grease a 12 capacity muffin tin with oil or butter.

Steam the cauliflower and mash with a potato masher. Allow to cool for 15 minutes. Stir in the bacon, cheese, salt and pepper to taste and beaten eggs. Mix thoroughly.

Fill each muffin cavity with the mixture and sprinkle with breadcrumbs. Place in the oven until golden brown, around 25 - 30 minutes.

Ease each "muffin" out of the tin with a spoon and serve :) They make a great accompaniment to any meal.


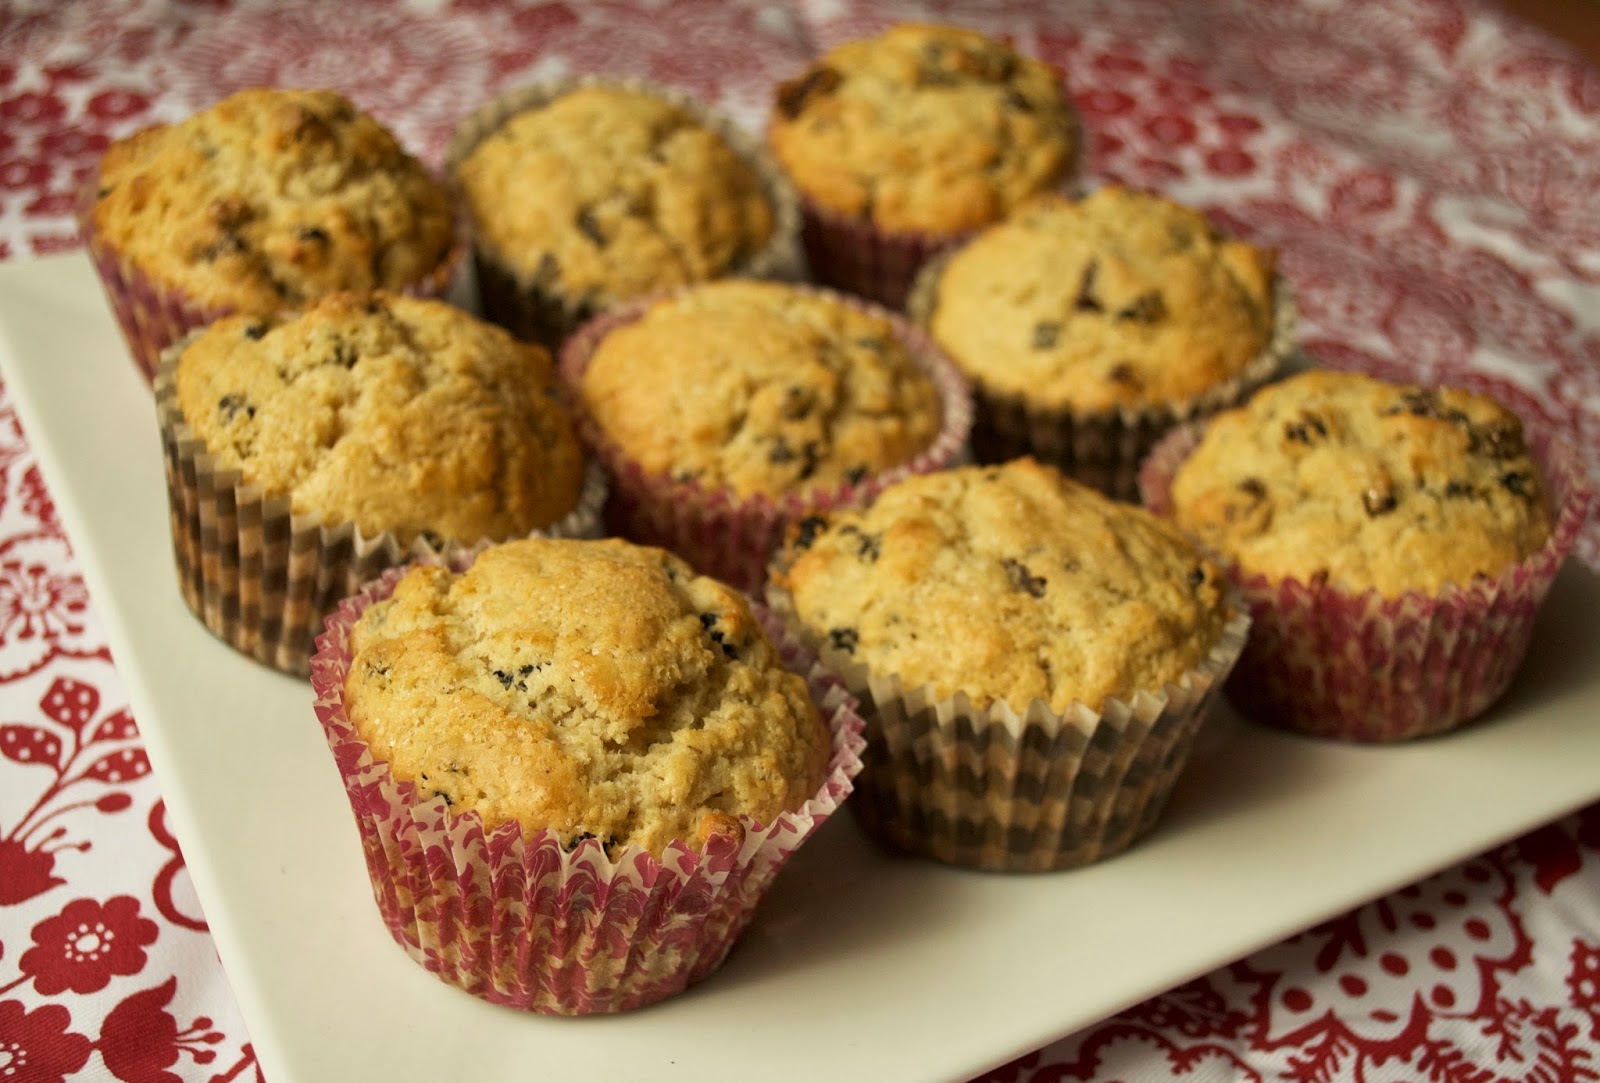
Rock cakes


These are a firm favourite in our family, a recipe that I come back to over and over. They are quick to make, use relatively few ingredients and are pretty healthy. They could be made healthier with wholemeal flour and a sugar substitute, but I'm happy to serve these to my kids as they are, knowing that they are fresh, home baked with no additives or preservatives :)


Our kids love to eat them warm from the oven, tops sliced off and spread with butter that melts in. They also love to top them with jam and cream (especially if the jam is home made!)


Here is the recipe for you to try, the kids like to help make them too.

Makes about 9 large rock cakes.

2 cups SR flour
1/4 teaspoon salt
1/2 teaspoon mixed spice (or you can use your favourite spices e.g. a combination of cinnamon, nutmeg and clove)
90grams butter
1/3 cup sugar of substitute
1/2 cup dried fruit (I used a mix of raisins, sultanas and currants)
1 egg
Milk to mix to a thick batter (around 1/2 cup?)
Raw sugar to top (optional)

Preheat oven to 190C and prepare a muffin tin with muffin patty pans. It helps to grease the top of the tray very lightly to prevent sticking. 
Sift flour, salt and spices into a large bowl. Add the chopped butter and rub into the flour until it resembles breadcrumbs. This step can be done in a food processor if you're feeling lazy (but then you have to wash the food processor bowl, so not worth the trouble to me!) Stir in the sugar and dried fruits. 
Add the egg and some of your milk and start mixing. You're going for a very thick, sticky batter, not dry at all. 
When thoroughly mixed, spoon the batter into the patty pans, filling about 3/4 of the way. This will give you a large cake that doesn't spill over the edge of the tin too much.
Sprinkle the tops of the batter with raw sugar (this is optional). 
Bake for around 18 minutes or until the tops are golden.
Turn out of tin onto a baking tray and watch them disappear!


Comfort food

I've been looking though some of my blog posts and am surprised how many recipes I've posted! 

We're in for a cold snap this week so it's the perfect time for some hot comfort food.


Here is a list for you to check out from my kitchen:

*Home made sausage rolls

*Silverbeet and ricotta pie

*Everyday bread

*Cheese and bacon scrolls

*Apple cinnamon porridge

*Coconut rice pudding

*Rhubarb and custard crumble

*Roasted pumpkin soup

*Homemade potato chips

*Pork and pepper casserole (not my recipe, but very awesome!)

*Home made pasta

*Cornflake slice

Hope you're keeping warm!

Super Marshmallow Banana Apple Fluff cake!


My 9 year old daughter decided it was high time for her to write a new cake recipe. She has made her Apple choc cake so many times and wanted something a bit different. This is what she came up with - the Super Marshmallow Banana Apple Fluff Cake!


1 cup SR flour
120 grams butter, melted
1/2 cup white sugar
1 cup whole milk
2 eggs, whisked
2 tablespoons rolled oats
1 teaspoon cinnamon
2 tablespoons desiccated coconut
1 tablespoon honey
1 banana, mashed
1 apple, chopped into smallish pieces
5 marshmallows, chopped in half
slivered almonds for topping

Preheat oven to 170 (C). Combine all dry ingredients in a large bowl. Add milk and eggs and whisk in. Combine melted butter and honey, whisk in. Add the mashed banana, apple and marshmallows and stir with a wooden spoon. Pour the cake batter into a lined and greased cake tin, scatter slivered almonds over the top. Bake for 40 - 50 minutes, checking the centre with a skewer for doneness.

Please let us know if you try this recipe, my daughter loves to receive feedback. Also, please post your questions and let us know if we've missed anything important!


Home made peanut butter

We go through plenty of peanut butter here and our youngest daughter in particular is mad about it on toast for breakfast. She is also a huge Nutella devotee.
I had heard that peanut butter is really easy to make and I don't know why I've never tried, but yesterday I was gripped with the thought this was something I needed to do!


I'm glad I did! It is different to store bought peanut butter (it tastes more nutty, more natural, more REAL!) 


Why don't you try it too? Here is how I made it:

* 500g roasted, salted peanuts 
1 teaspoon of salt
2 teaspoons of honey
 ** 2 tablespoons of peanut oil

Place your nuts in a food processor. Blend until they are coarsely ground. At this point, if you want chunky peanut butter (like I did) take about 1/3 of the ground nuts out and set aside.
Add the salt and honey. Continue to blend until your mix is smooth or starts to look like a paste. Times really vary depending on your food processor, but it's generally a couple of minutes to get to the paste stage. Now, drizzle your oil in and blend until it's a smooth paste. Add your coarse nuts back in and mix through. Put your paste into a jar or sealed container. Drizzle a little more oil over the top as a seal.
I've been told that in needs to be kept in the fridge - I'm not sure if this is totally necessary, I think I will experiment by leaving some out to see how it goes.

* If you want to use peanuts from the shell or raw peanuts you can roast them yourself. Then just follow the steps from the beginning.
** If you find your paste is dry try adjusting the oil amount.

Isn't that simple? Next up I want to try doing Nutella and almond butter would be fun too. Let me know if you give it a go!


Frugal February in the kitchen

The months of December through to March are our most challenging financially. Christmas, followed by holidays, plus bills and insurance mean that we really have to pull in the reigns and make an extra effort to save money. I thought I would share with you a few of the thrifty things I've been doing in the kitchen. 


Last month I set myself a water challenge. It's Summer here in Australia and we're using a lot of water on the garden (we have a tank for the garden, but without rain there is no tank water). 


*Place a container in the sink and use the water from rinsing fruit, vegetables and eggs on the garden.
* Run water into a jug while waiting for hot water - I get heaps of water this way, which either goes into our purification jug or onto the garden.
*Halve the amount of water you normally wash up with. There is no need to fill the sink with hot water to do the dishes! I've been really surprised by how little I can use for this purpose. This goes for floor washing too - you don't need that much (not that I wash my floors all that often, ahem..)


Next up is the use of appliances and utilities (gas, electricity) in the kitchen.

*If steaming vegetables, boil until steaming is underway, turn off the gas and keep the lid on. I find this is enough to steam the veggies without having to use another 5 - 10 minutes of gas.
*The oven can also be turned off early. When I make bread, I turn off the oven 5 minutes before the bread is done and let it sit with the door closed. It stays hot enough to cook and it saves 5 minutes of cooking time. Add that up over a year and it would be a lot of time!
*Bake your own bread. I've been doing this for a long time and it saves us a lot of money. The whole family prefers homemade loaves too. I bake 4 at a time to get the most out of the oven.
*Think about the appliance before you use it. Is it really necessary to plug into the electricity if you can do it by hand? For example, we sweep hard floors instead of vacuuming, our cooking ingredients are often mixed by hand and all our dishes are done in the sink with no dishwasher.

I'd love to hear your frugal tips for February too!

Sourdough

I've tried sourdough starters from scratch many times. Some of the starters went really well but baked really poorly. Others just went off. I became despondent. But something about the warmer weather gets me to thinking about sourdough and I always feel like having another go. This time around I decided to increase my chances of success by buying a starter. I got a partially dehydrated starter from Sourdough Companion, followed the instructions to "wake it up" and away I went!


After the starter was activated (about 24 hours after adding water) I divided it in two to start the feeding stage. The one on the left was fed with organic white flour and filtered water. The one on the right was fed with wholemeal flour and filtered water. I wanted to divide them in case of disaster - my hope was that at least one would survive.
24 hours later they looked like they do in the picture above. Increased in size, lovely bubbly holes and a pleasant, slightly sour aroma.


After this first feeding the starter was ready to bake with. Wanting to remain on the cautious side, I decided to bake plain white loaves. Very simple ingredients - white flour, starter, salt and water.
I baked on a very warm day, so total rising time was around 6 hours, which was perfect. They turned out great!

Two days later I did my second bake. I kept the starters in the fridge in between and got them out for 2 hours before using. This time I tried overnight proving - one batch of dough in the fridge and one out on the bench top on a relatively cool night. I didn't get as much rise (even overnight which ended up being about 14 hours total proving time!) However, the resulting bread still had a great taste and dense, springy texture.

I'm very happy to be able to add sourdough to my bread making repertoire and now plan to bake sourdough twice a week and yeasted bread once or twice a week (my 5 year old does not have the acquired taste for sourdough yet!) My starters are happily living in the fridge in between bakes and do very well after an outing and a feed.


Silverbeet and ricotta pie


1 onion, chopped
2 cloves crushed garlic
2 stalks celery, chopped
1 potato, finely chopped
300grams greens (silverbeet, spinach, kale, or a combination of greens)

450grams fresh ricotta
2 eggs
rind of 1/2 a lemon, grated
20grams grated parmesan
1/4 teaspoon nutmeg
salt and pepper to taste
2 sheets puff pastry (shop bought or homemade)


Preheat oven to 180 degrees celsius. 

In a large frying pan, fry the onion in oil for 5 minutes. Add the garlic, celery, potato and silver beet (or greens). Continue frying until silver beet is wilting. Take off the heat and allow to cool a little.

Meanwhile, mash together in a large bowl the ricotta, eggs, lemon, parmesan, nutmeg and salt and pepper. 

Grease your pie dish and lay a sheet of pastry as the base. 

Mix the vegetables into the ricotta mixture until nicely blended. Place the mixture into the pie dish.
Cover with another sheet of pastry, pressing down around the edges of the dish. Slash a couple of slits in the top with a sharp knife.

Bake in the oven for about 45 minutes or until the pie is golden brown and layers of the pastry are separating slightly.

I think this pie would be wonderful with filo pastry as well, maybe some feta cheese crumbled in? Next time! 

And, just for fun and because I do love pie!

Everyday bread


This is the recipe I make for a delicious yet not too time consuming bread for every day use. Makes 2 large loaves.

100g wholemeal flour
900g unbleached plain flour
2.5 teaspoons dried yeast
2.5 teaspoons salt
3 tablespoons sunflower oil
Approx 700ml warm water (varies with temp, dryness of flour etc)

Place all dry ingredients into your mixmaster's mixing bowl with the dough hook fitted. Start machine on low and drizzle most of the water in. Allow to mix for a minute or so, then add more water if needed. The dough should be really moist but not so sticky it can't be handled. 
Keep mixing on low for at least 5 minutes. Turn out of bowl onto an oiled bench and oil the bottom and inside of the bowl. Place the dough back in the bowl, oil the top lightly and cover with plastic wrap. Leave for 1.5 hours or until double in size. In cooler weather this will take longer.

Turn the dough out onto a bench and cut in half with a sharp knife. Knead each piece lightly then shape into required shape. You can do freeform loaves or use bread tins - I do either depending on my mood :) Freeform loaves can be placed on baking trays. Cover loaves with plastic wrap to rest.
Preheat your oven to 250 degrees (C). Allow the loaves to sit for 30 minutes. Slash the tops with a sharp knife and place in the oven. Set the timer for 5 minutes. When timer goes off, turn the temperature down to 230 degrees and set the timer to 30 minutes.
Remove from oven when done and cool on a baking rack. 

Linking up with Creative Friday.


This blog is closing!

All posts will now be found at my new site.  Click here to go the the new site.